> ## Documentation Index
> Fetch the complete documentation index at: https://docs.chatros.com/llms.txt
> Use this file to discover all available pages before exploring further.
# Build Your First AI Agent
> Create, train, and deploy your first AI Agent in under 5 minutes
Create, train, and deploy your first AI Agent in under 5 minutes. Follow this step-by-step guide to get your intelligent assistant live on your website.
## Prerequisites
You'll need an active ChatRos account to follow this guide. [Sign up here](https://chatros.com/register) if you haven't already.
## Overview
Here's what we'll accomplish in this guide:
1. **Create & Train Your Agent** - Set up a new AI Agent and train it using your website or documents
2. **Test & Optimize** - Use the test page to test responses and fine-tune performance using the Compare feature
3. **Deploy to your Website** - Add your AI Agent to your website with a simple embed code
**Estimated time:** 5 minutes from start to finish
***
## Step 1: Create & Train Your AI Agent
### Navigate to Your Dashboard
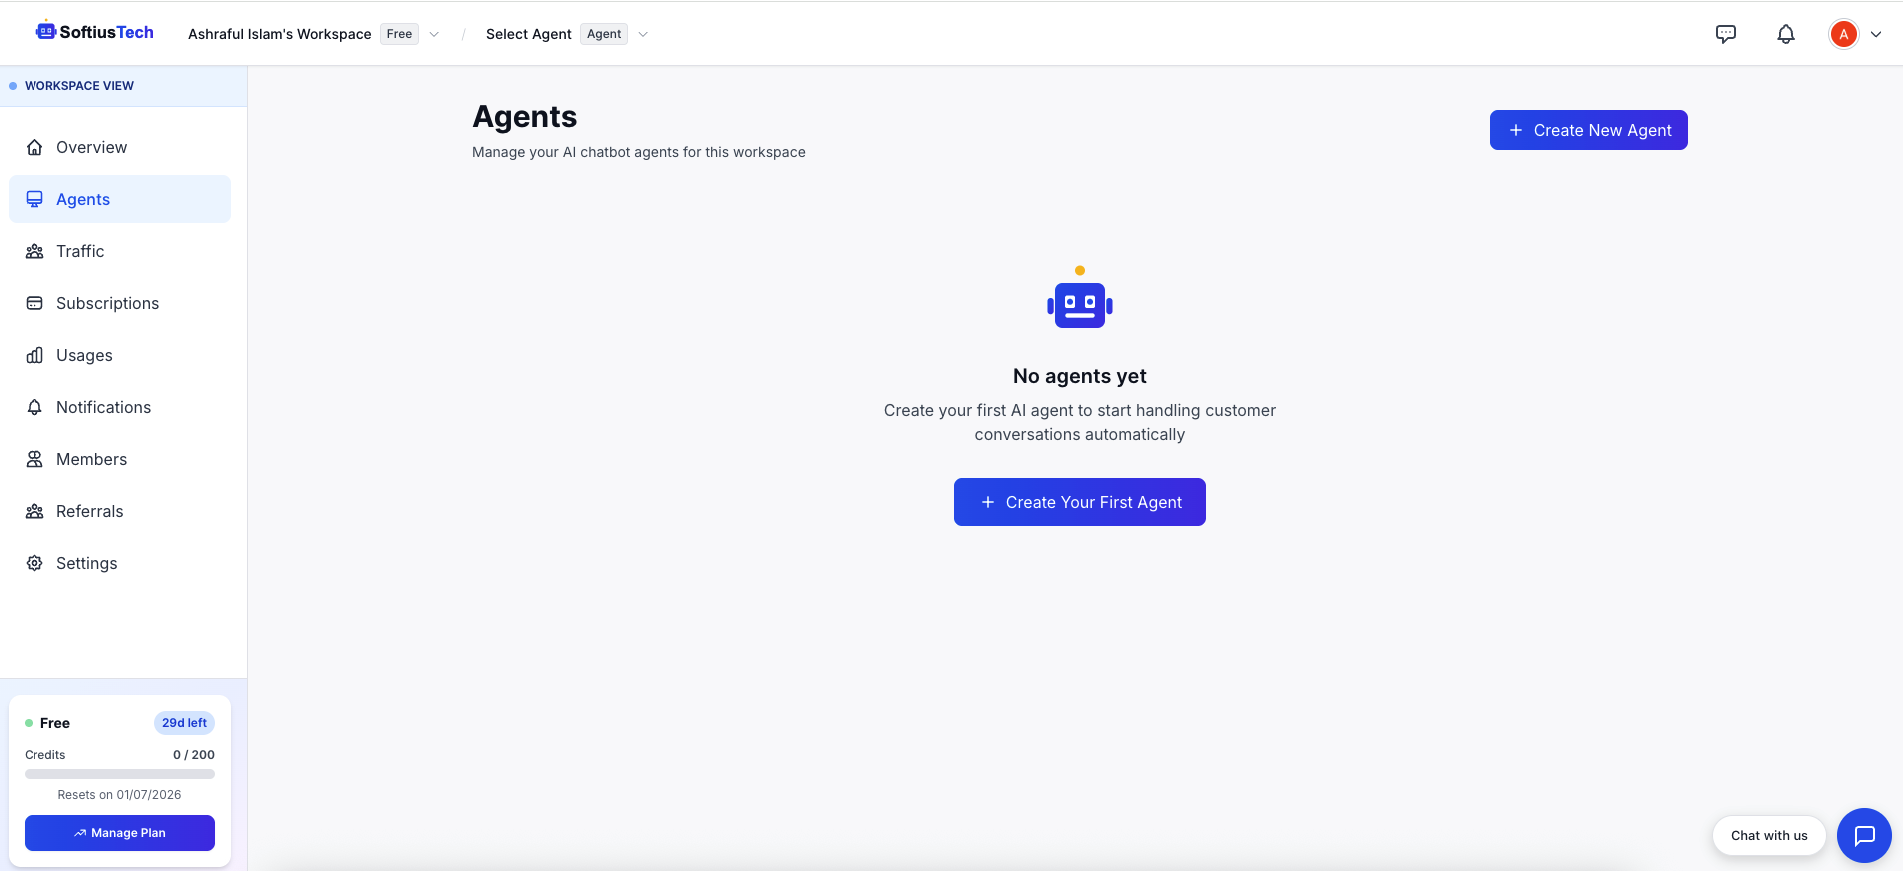
After signing into your ChatRos account, go to your main dashboard. Click the **"Create New Agent"** button to get started.
 ### Select Agent Mode
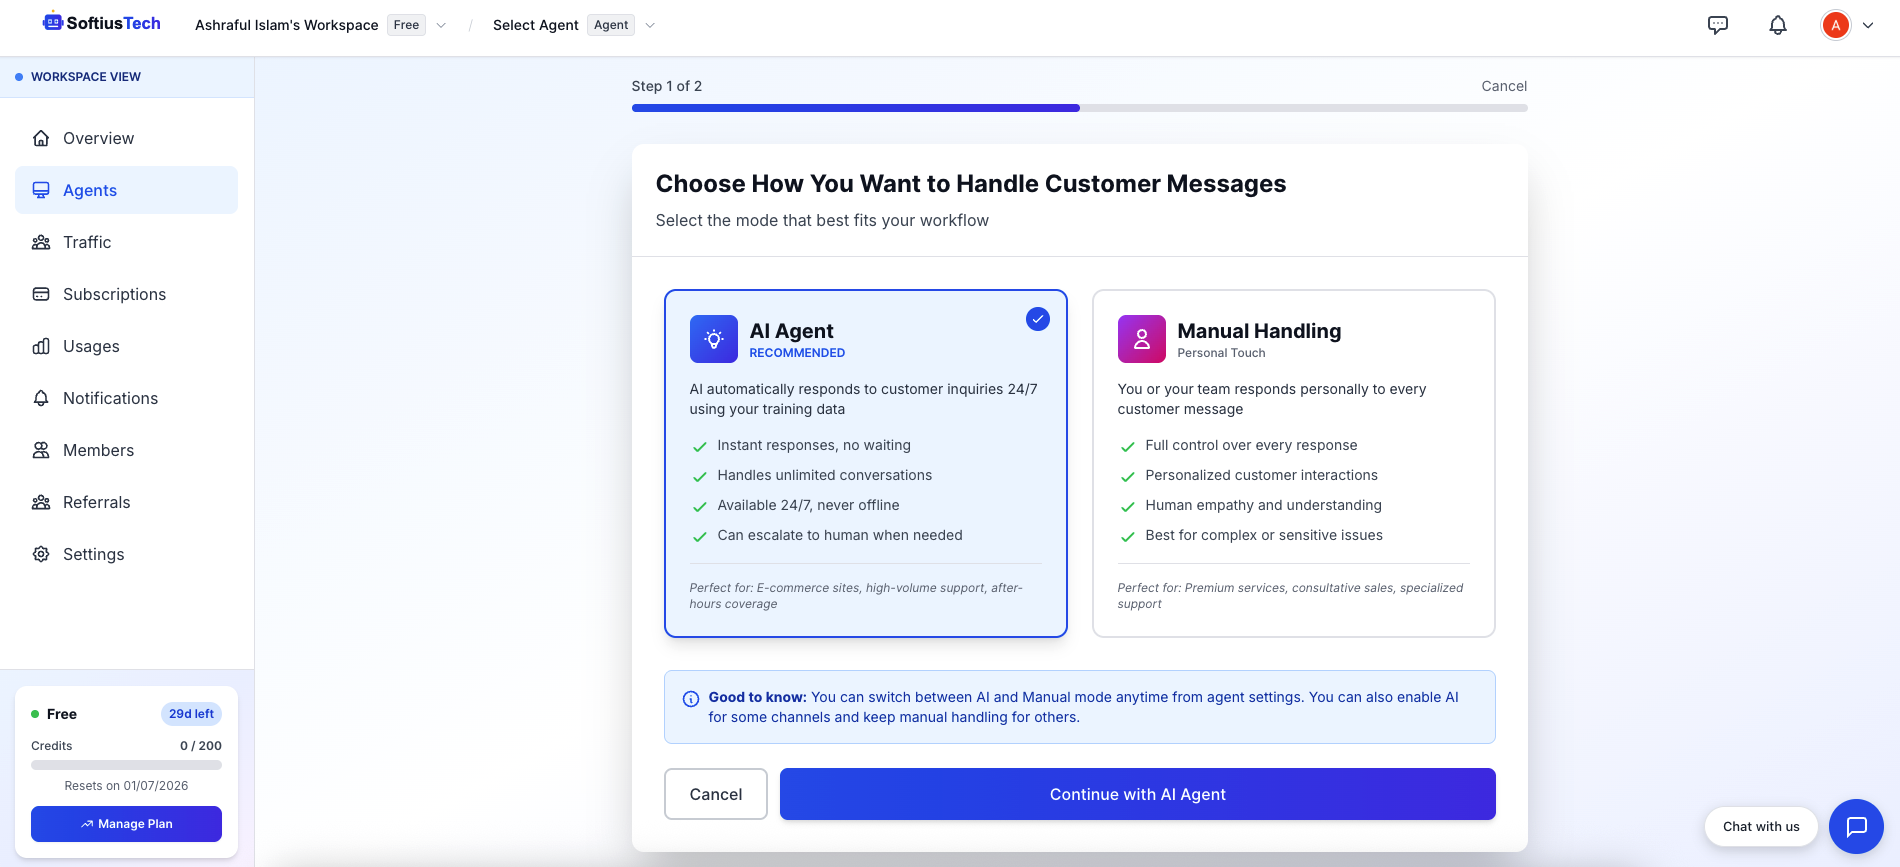
Choose the mode that best fits your needs. Select your preferred agent configuration to continue.
### Select Agent Mode
Choose the mode that best fits your needs. Select your preferred agent configuration to continue.
 ### Name Your Agent
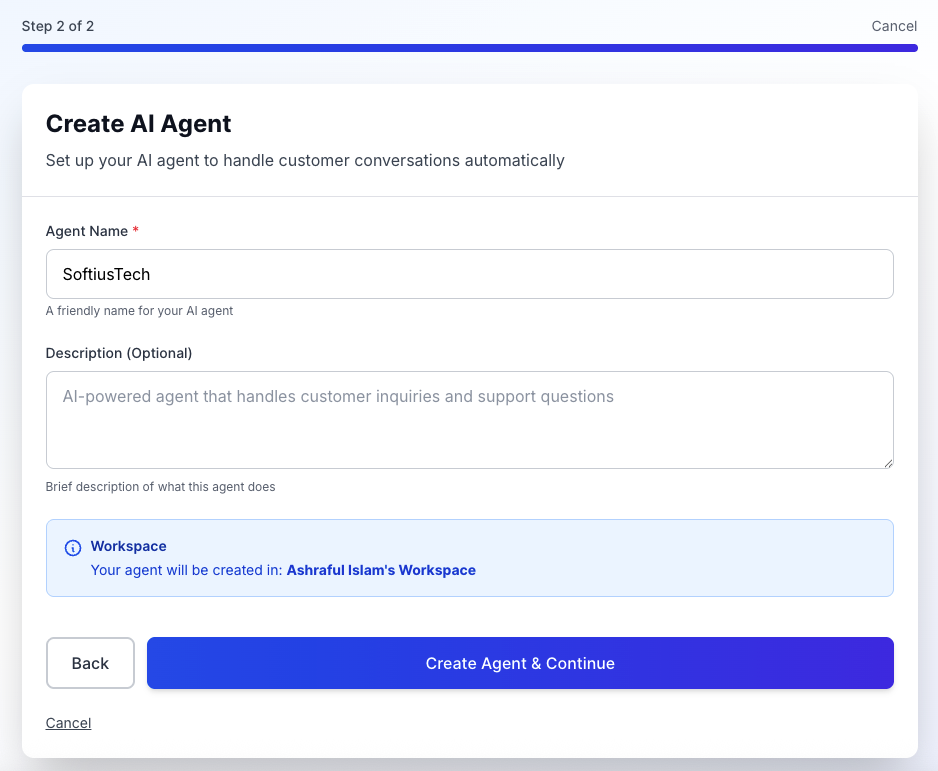
Enter a name for your AI Agent. Choose a name that reflects its purpose or your brand.
### Name Your Agent
Enter a name for your AI Agent. Choose a name that reflects its purpose or your brand.
 ### Configure Manual Mode (If Selected)
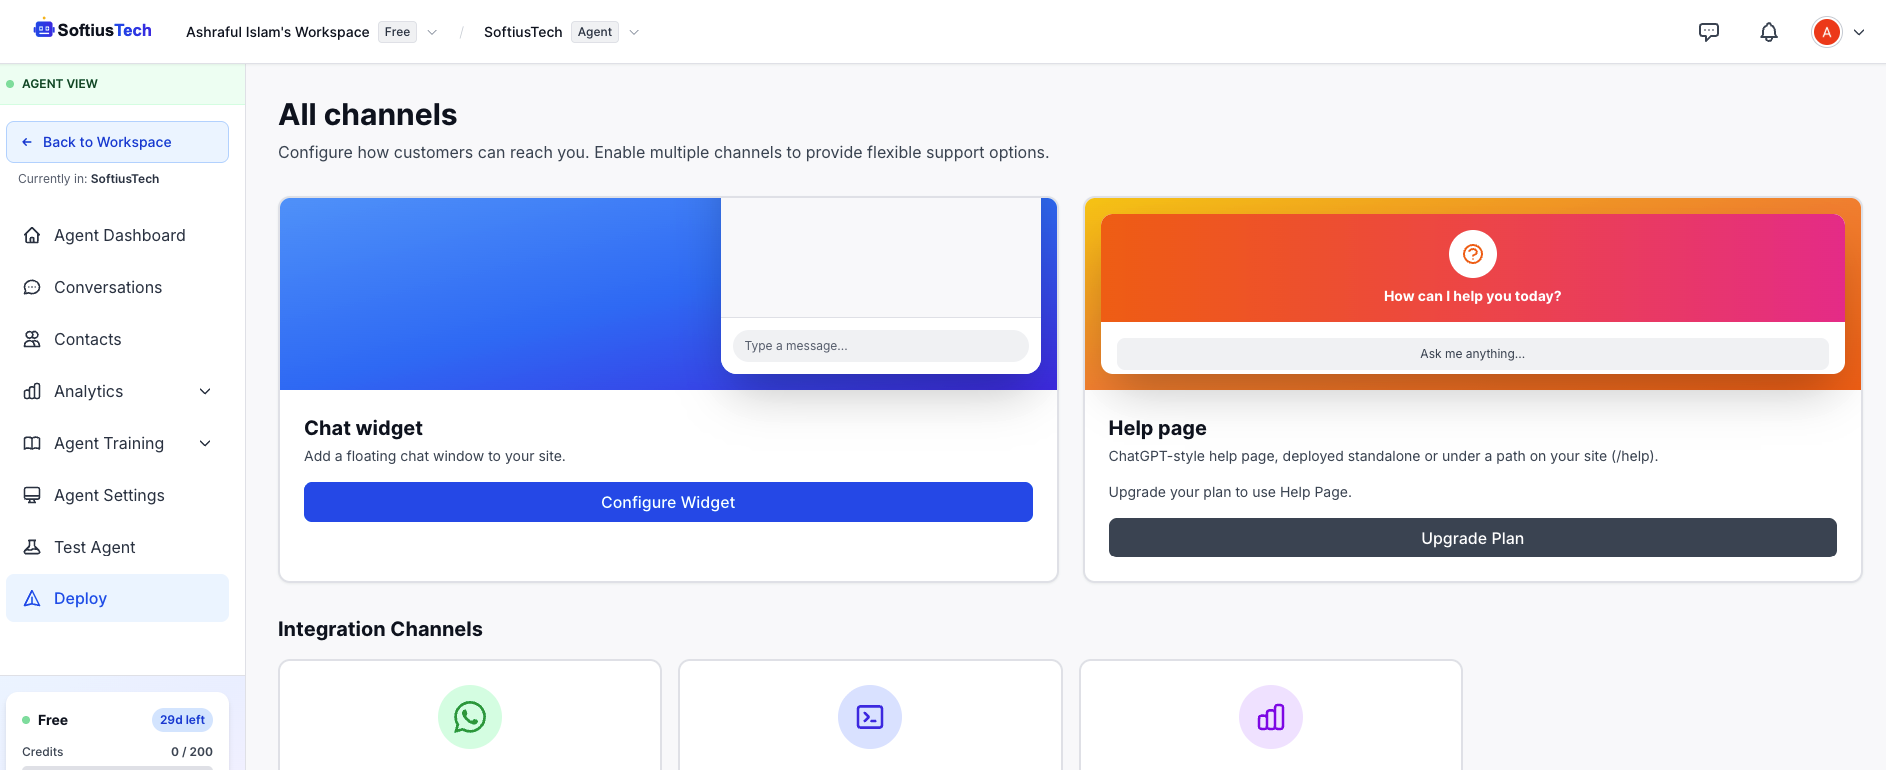
If you chose manual mode, you'll see deployment options. Configure your preferred deployment settings.
### Configure Manual Mode (If Selected)
If you chose manual mode, you'll see deployment options. Configure your preferred deployment settings.
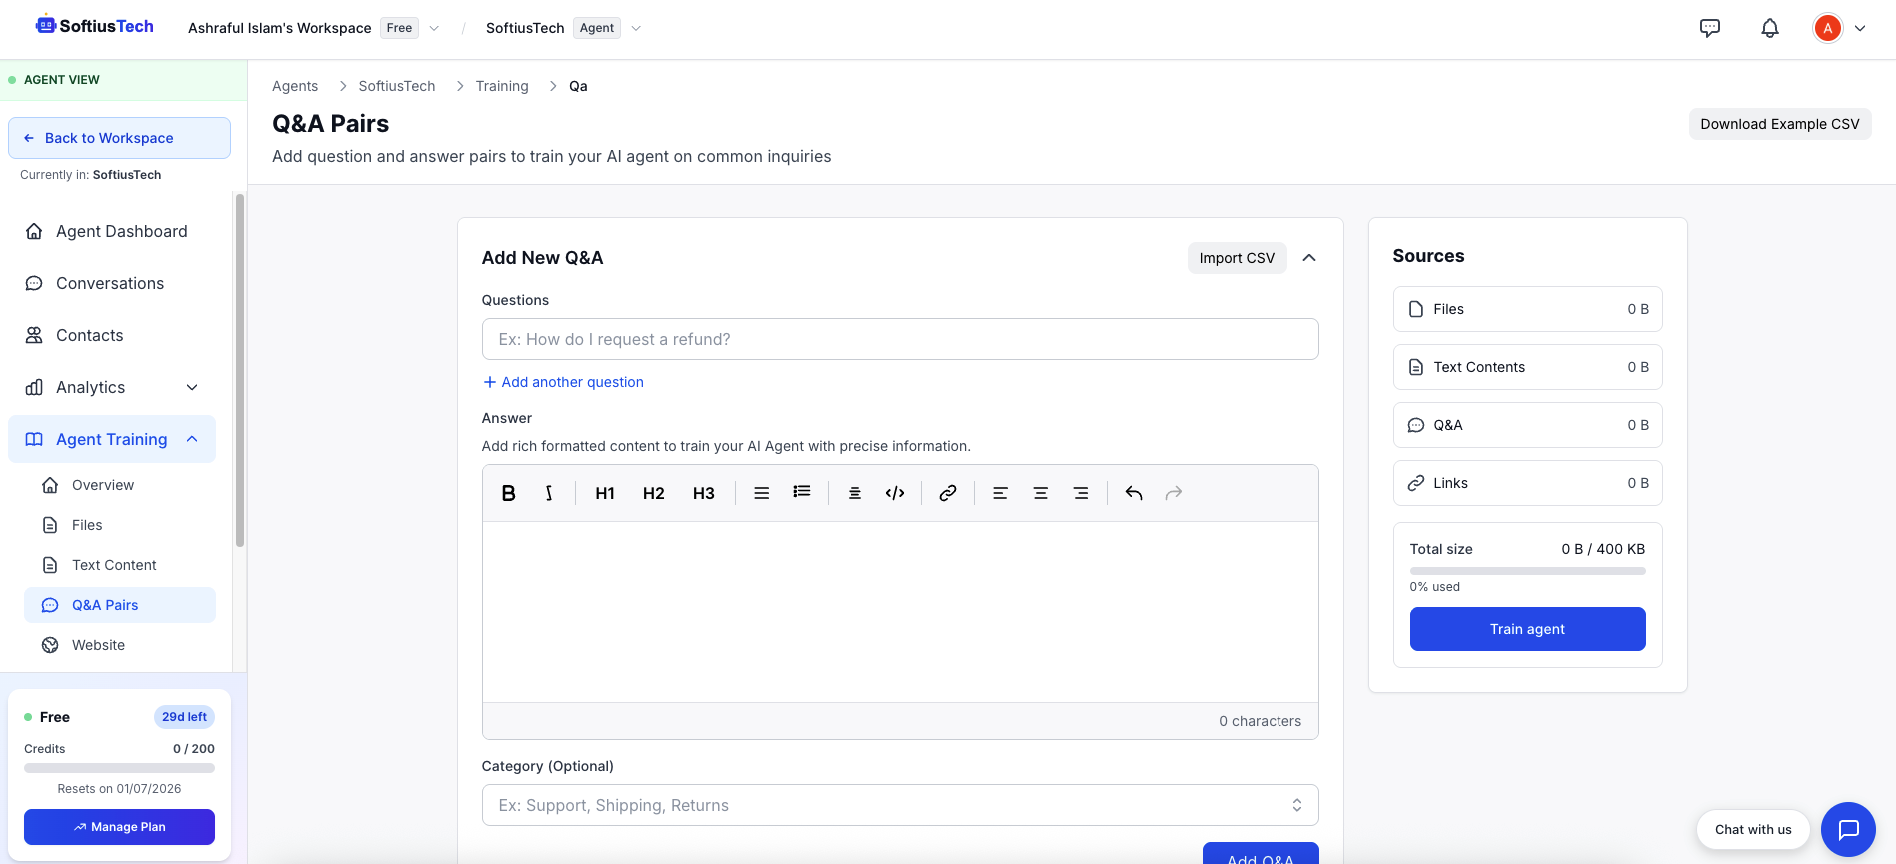
 ### Choose Your Training Data
Your AI Agent needs information to learn from. You can train it using various data sources:
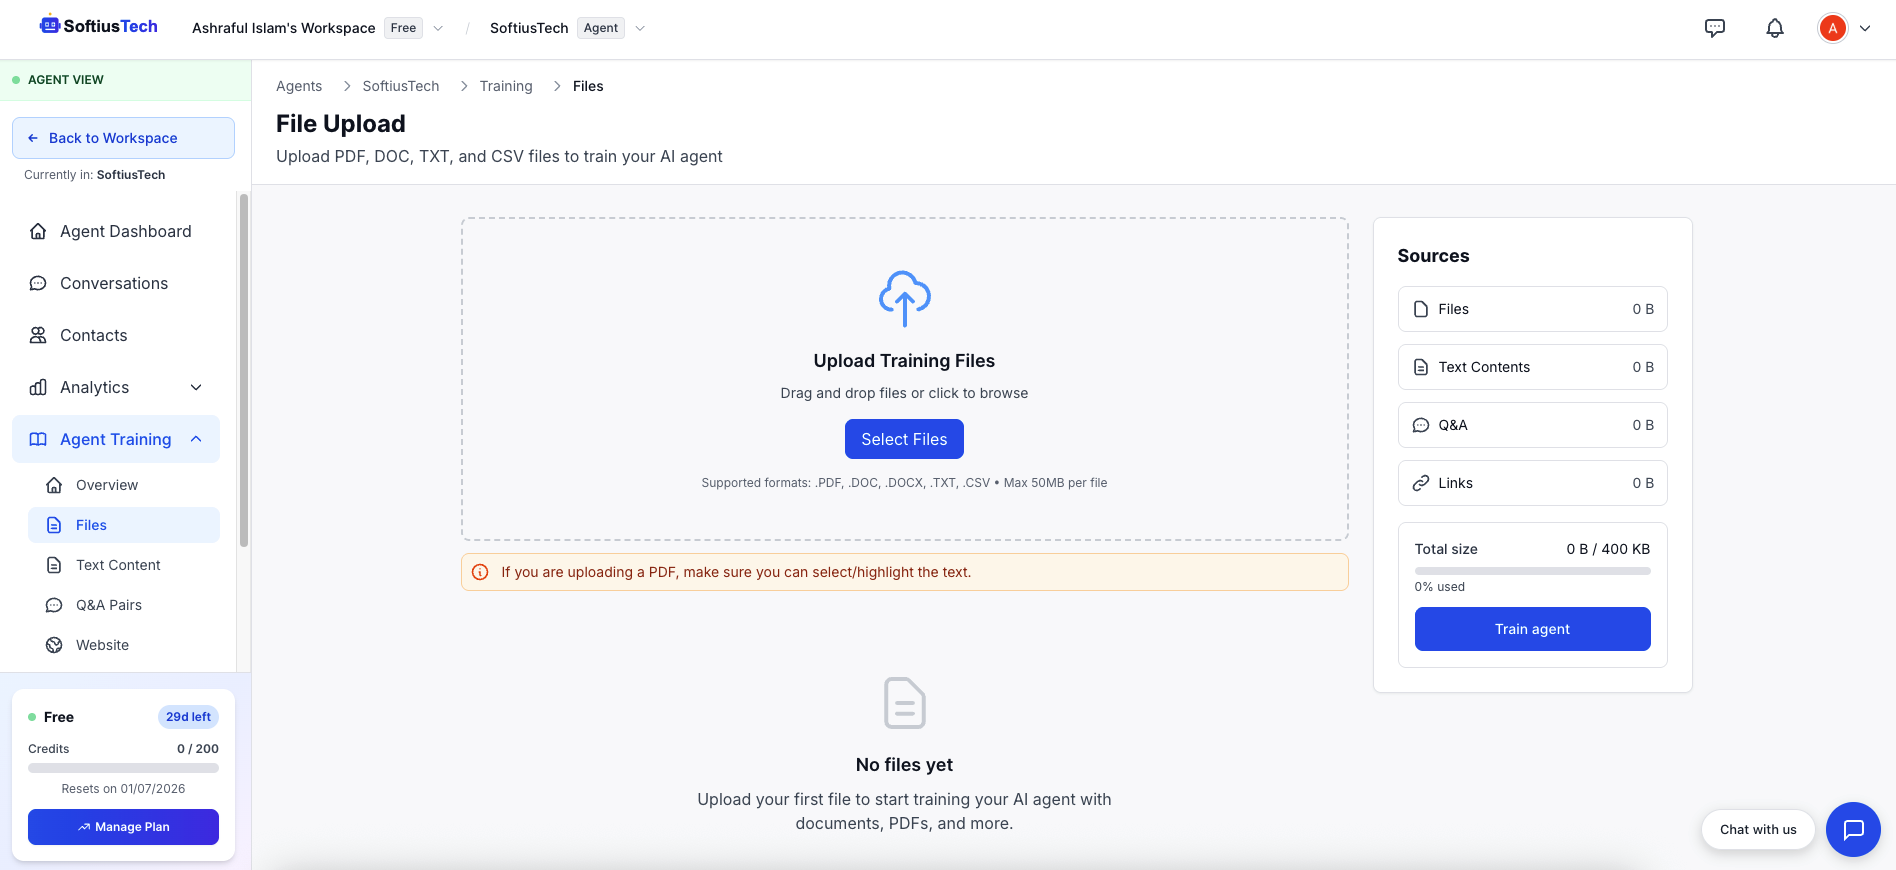
**Upload your documents**
Train your agent on your documents.
**Best for:** Business documents, manuals, FAQs, product information, etc.
### Choose Your Training Data
Your AI Agent needs information to learn from. You can train it using various data sources:
**Upload your documents**
Train your agent on your documents.
**Best for:** Business documents, manuals, FAQs, product information, etc.
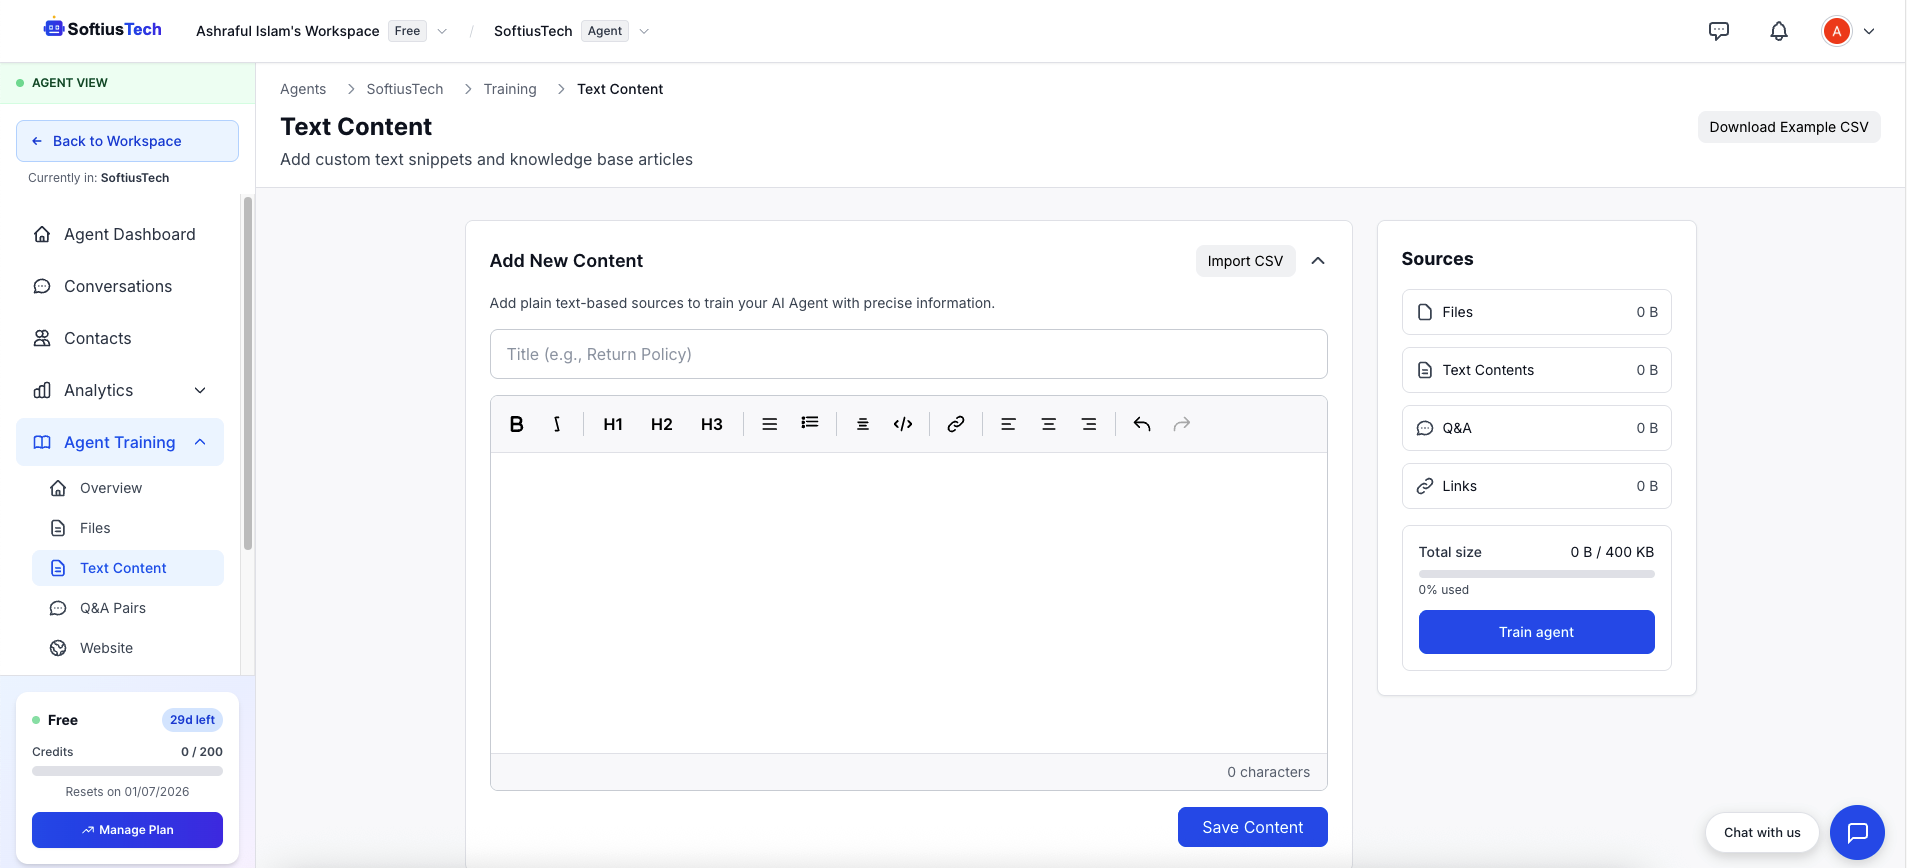
 **Paste text directly**
Add text content directly without uploading files.
**Best for:** Copy-pasted content, quick testing, formatted text snippets.
**Paste text directly**
Add text content directly without uploading files.
**Best for:** Copy-pasted content, quick testing, formatted text snippets.
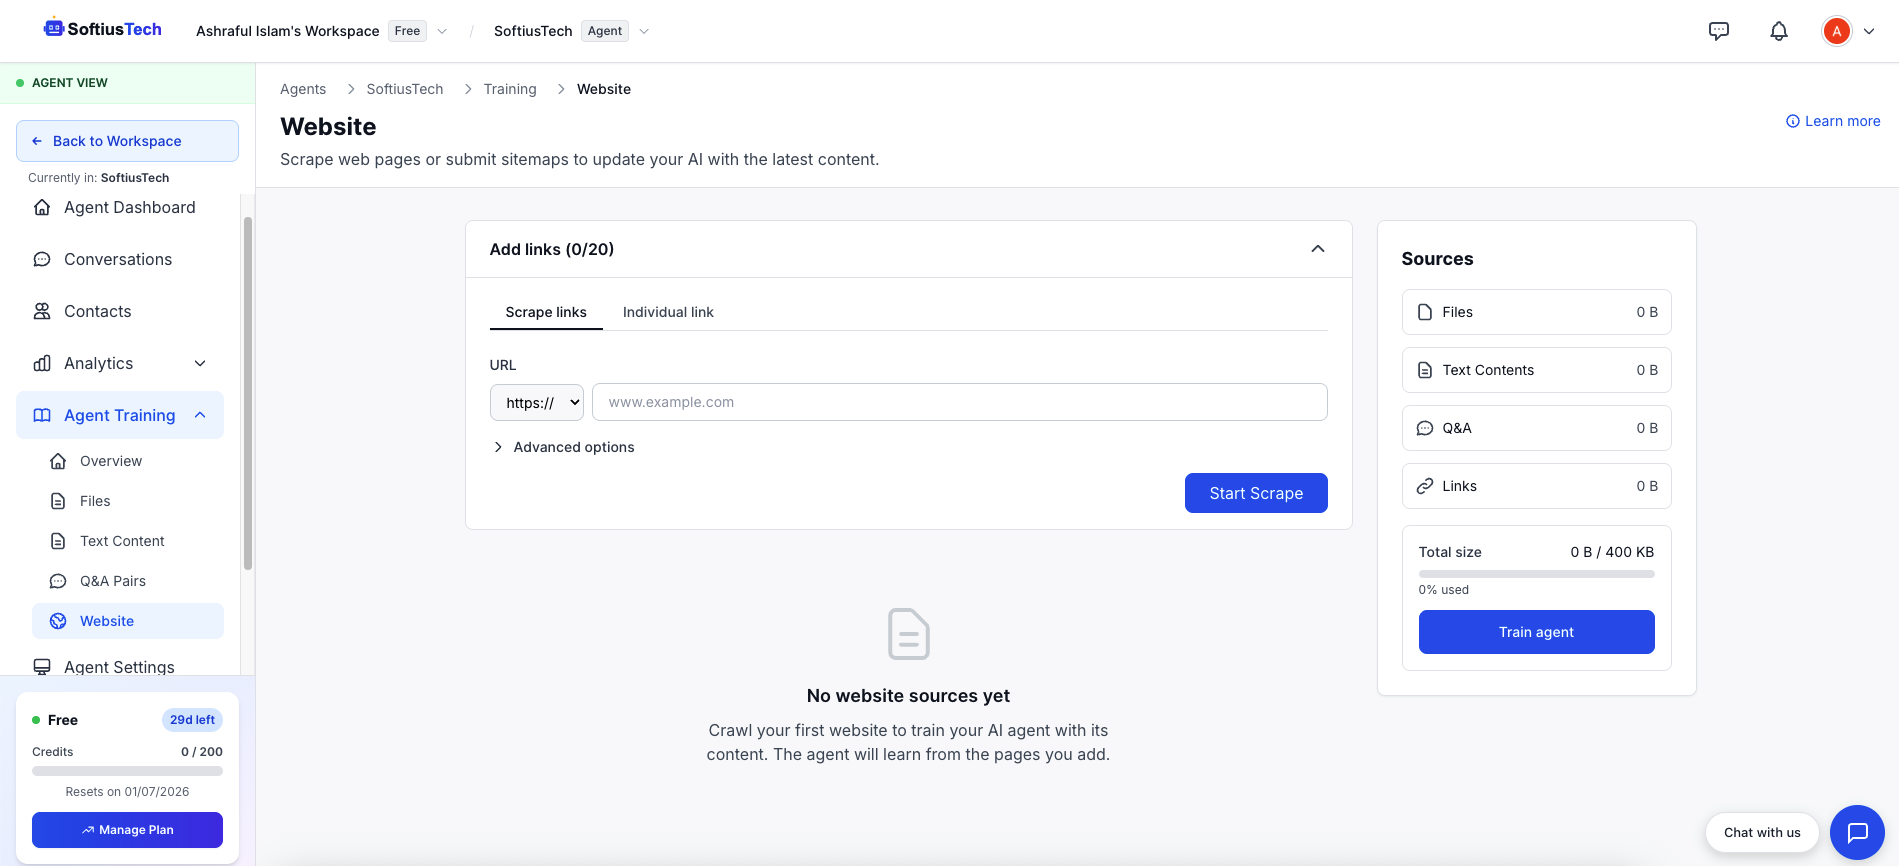
 **Crawl your website**
Automatically scrape content from your website URL.
**Best for:** Documentation sites, blogs, knowledge bases, product pages.
**Crawl your website**
Automatically scrape content from your website URL.
**Best for:** Documentation sites, blogs, knowledge bases, product pages.
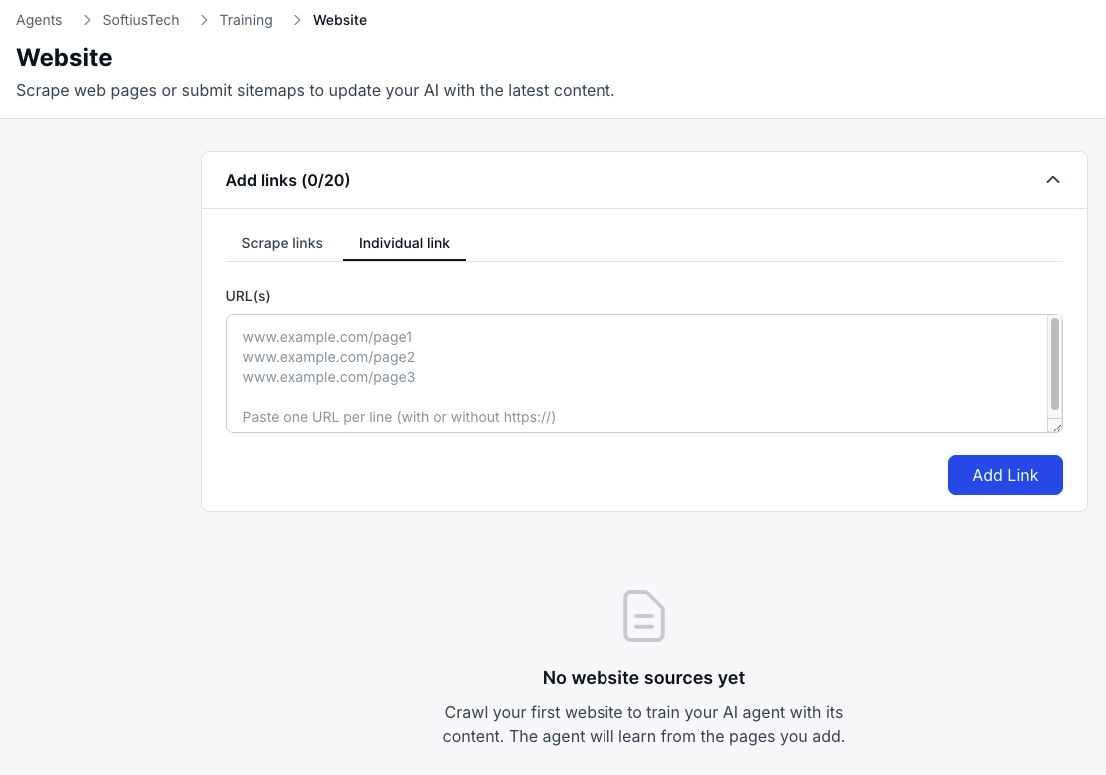
 **Individual Links**
You can also add specific individual page URLs instead of crawling the entire site. This gives you precise control over which pages to include in your training data.
**Individual Links**
You can also add specific individual page URLs instead of crawling the entire site. This gives you precise control over which pages to include in your training data.
 **Add question-answer pairs**
Create specific Q\&A pairs for precise responses.
**Best for:** FAQs, common customer questions, specific scenarios.
**Add question-answer pairs**
Create specific Q\&A pairs for precise responses.
**Best for:** FAQs, common customer questions, specific scenarios.
 ### Review & Start Training
Click **"Train Agent"** to begin the training process.
### Review & Start Training
Click **"Train Agent"** to begin the training process.
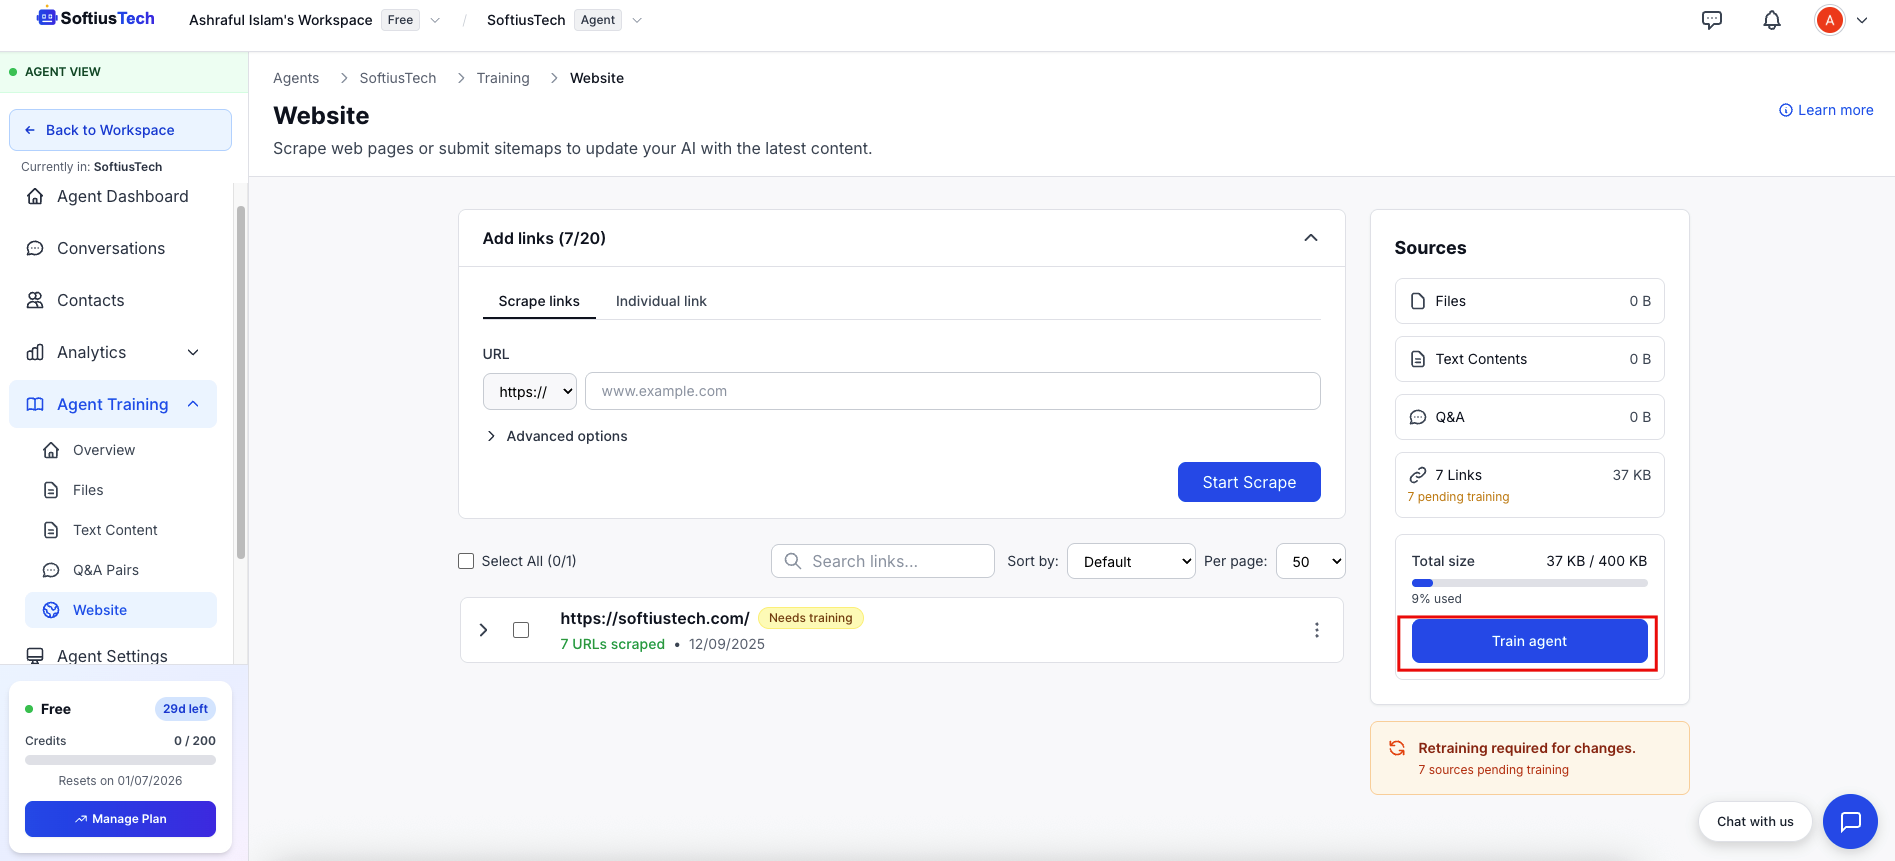 Training typically takes 2-5 minutes depending on the amount of data. You can proceed to the next step while training completes.
**Character Limits:** Different plans have different character limits for training data. Check your plan if you hit any limits.
## Step 2: Test & Optimize Your AI Agent
### Access the Test Agent Page
Once training begins, you can go to the **Test Agent** page - your testing environment where you can chat with your AI Agent and fine-tune it before making it live.
Training typically takes 2-5 minutes depending on the amount of data. You can proceed to the next step while training completes.
**Character Limits:** Different plans have different character limits for training data. Check your plan if you hit any limits.
## Step 2: Test & Optimize Your AI Agent
### Access the Test Agent Page
Once training begins, you can go to the **Test Agent** page - your testing environment where you can chat with your AI Agent and fine-tune it before making it live.
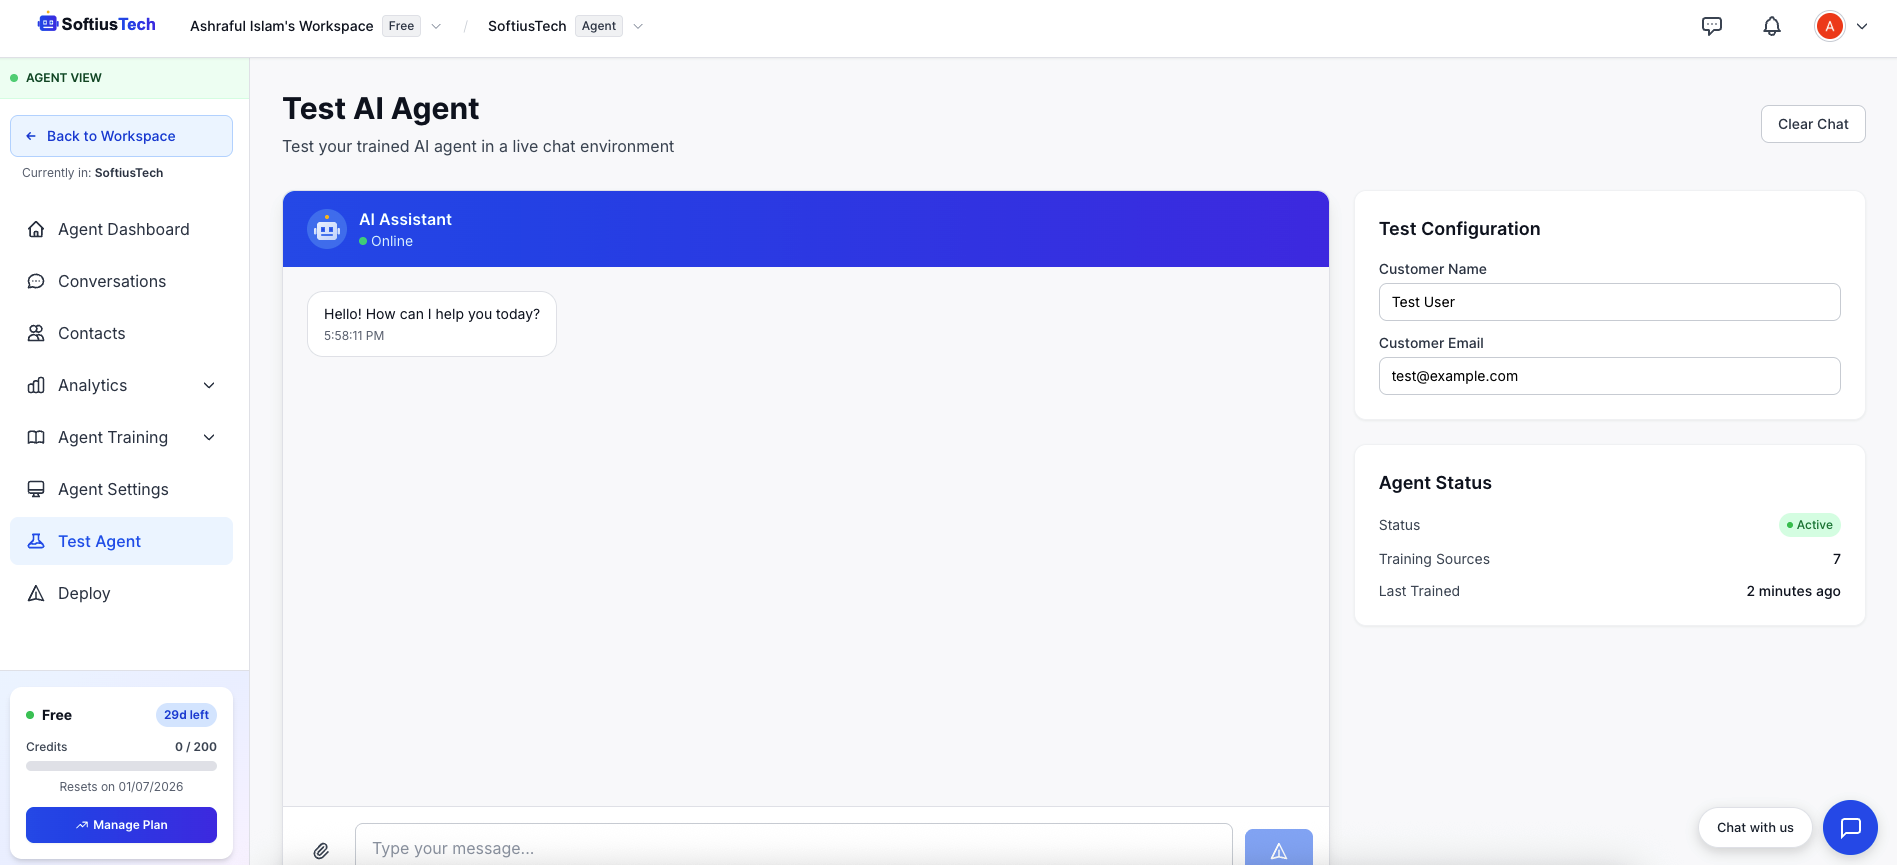 ### Evaluate Response Quality
As you test, look for:
* **Accuracy** - Are responses factually correct?
* **Relevance** - Does it answer what was asked?
* **Completeness** - Are responses comprehensive but concise?
* **Tone** - Does it match your brand voice?
## Step 3: Deploy to Your Website
### Navigate to the Deploy Section
Once you're satisfied with your AI Agent's responses, it's time to make it live! Navigate to the **"Deploy"** tab in the sidebar, and toggle the switch on the **"Chat widget"** card to enable the agent.
### Evaluate Response Quality
As you test, look for:
* **Accuracy** - Are responses factually correct?
* **Relevance** - Does it answer what was asked?
* **Completeness** - Are responses comprehensive but concise?
* **Tone** - Does it match your brand voice?
## Step 3: Deploy to Your Website
### Navigate to the Deploy Section
Once you're satisfied with your AI Agent's responses, it's time to make it live! Navigate to the **"Deploy"** tab in the sidebar, and toggle the switch on the **"Chat widget"** card to enable the agent.
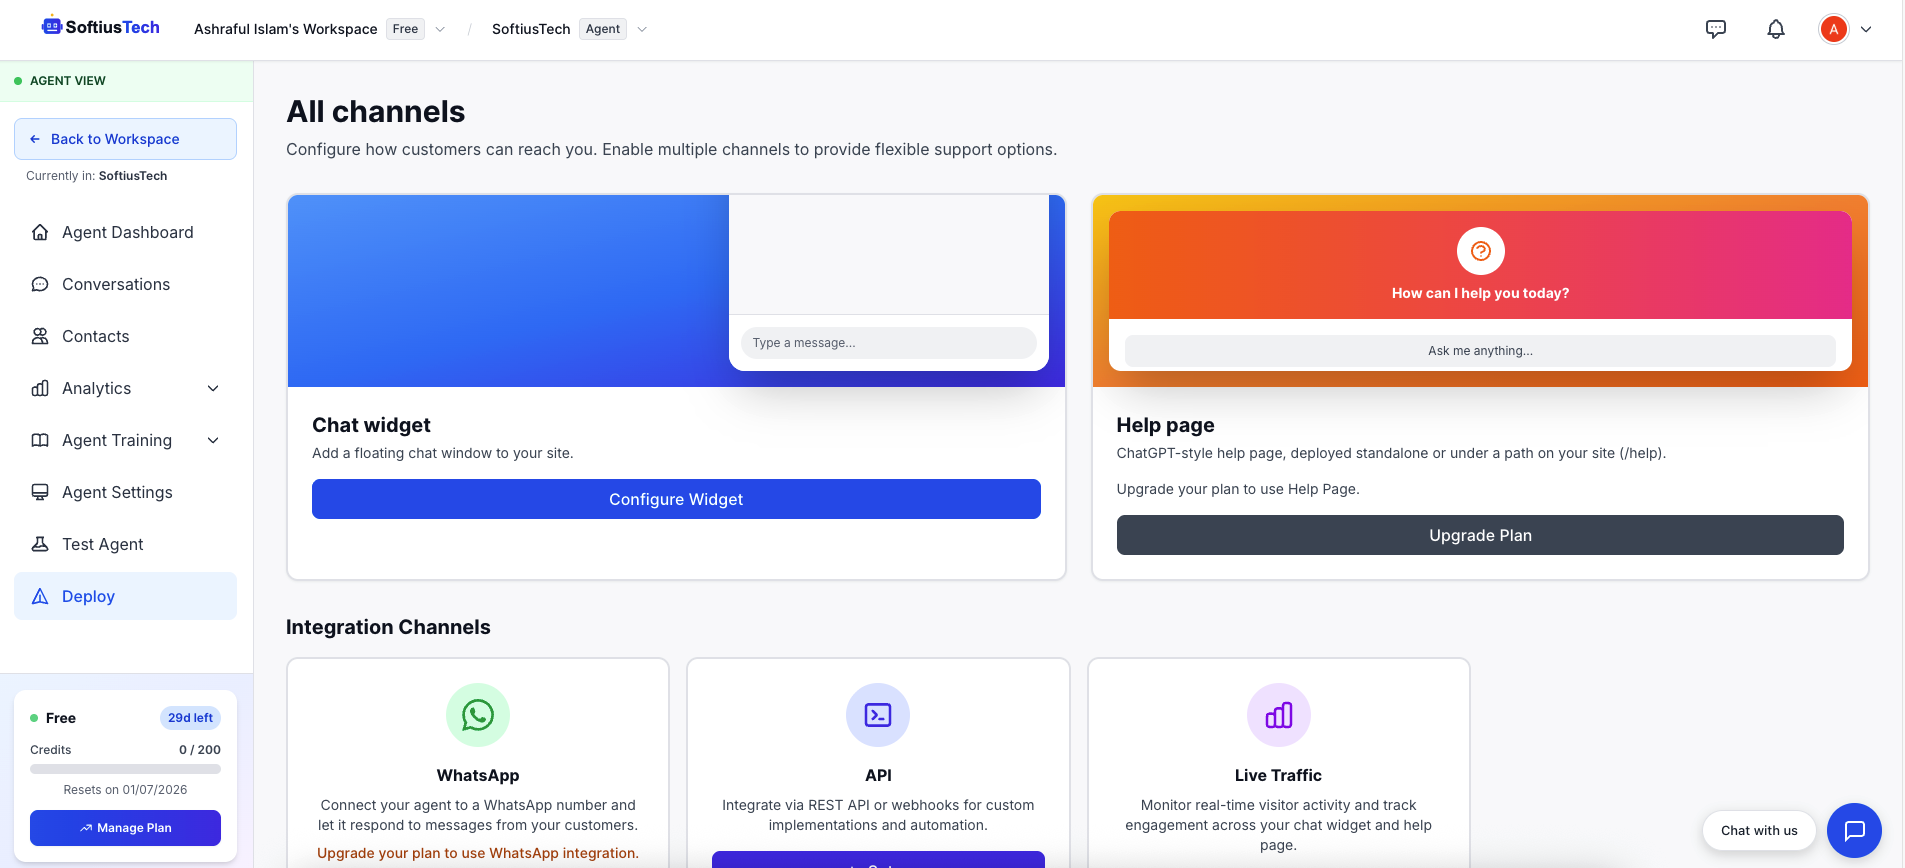 **Disabled vs Enabled:** Disabled agents are only accessible to workspace members. Enabled agents can be embedded on websites and accessed by anyone with the link.
### Choose Your Deployment Method
ChatRos offers multiple deployment methods including chat widget, help page, and integrations with WhatsApp, WordPress, and other platforms.
**Disabled vs Enabled:** Disabled agents are only accessible to workspace members. Enabled agents can be embedded on websites and accessed by anyone with the link.
### Choose Your Deployment Method
ChatRos offers multiple deployment methods including chat widget, help page, and integrations with WhatsApp, WordPress, and other platforms.
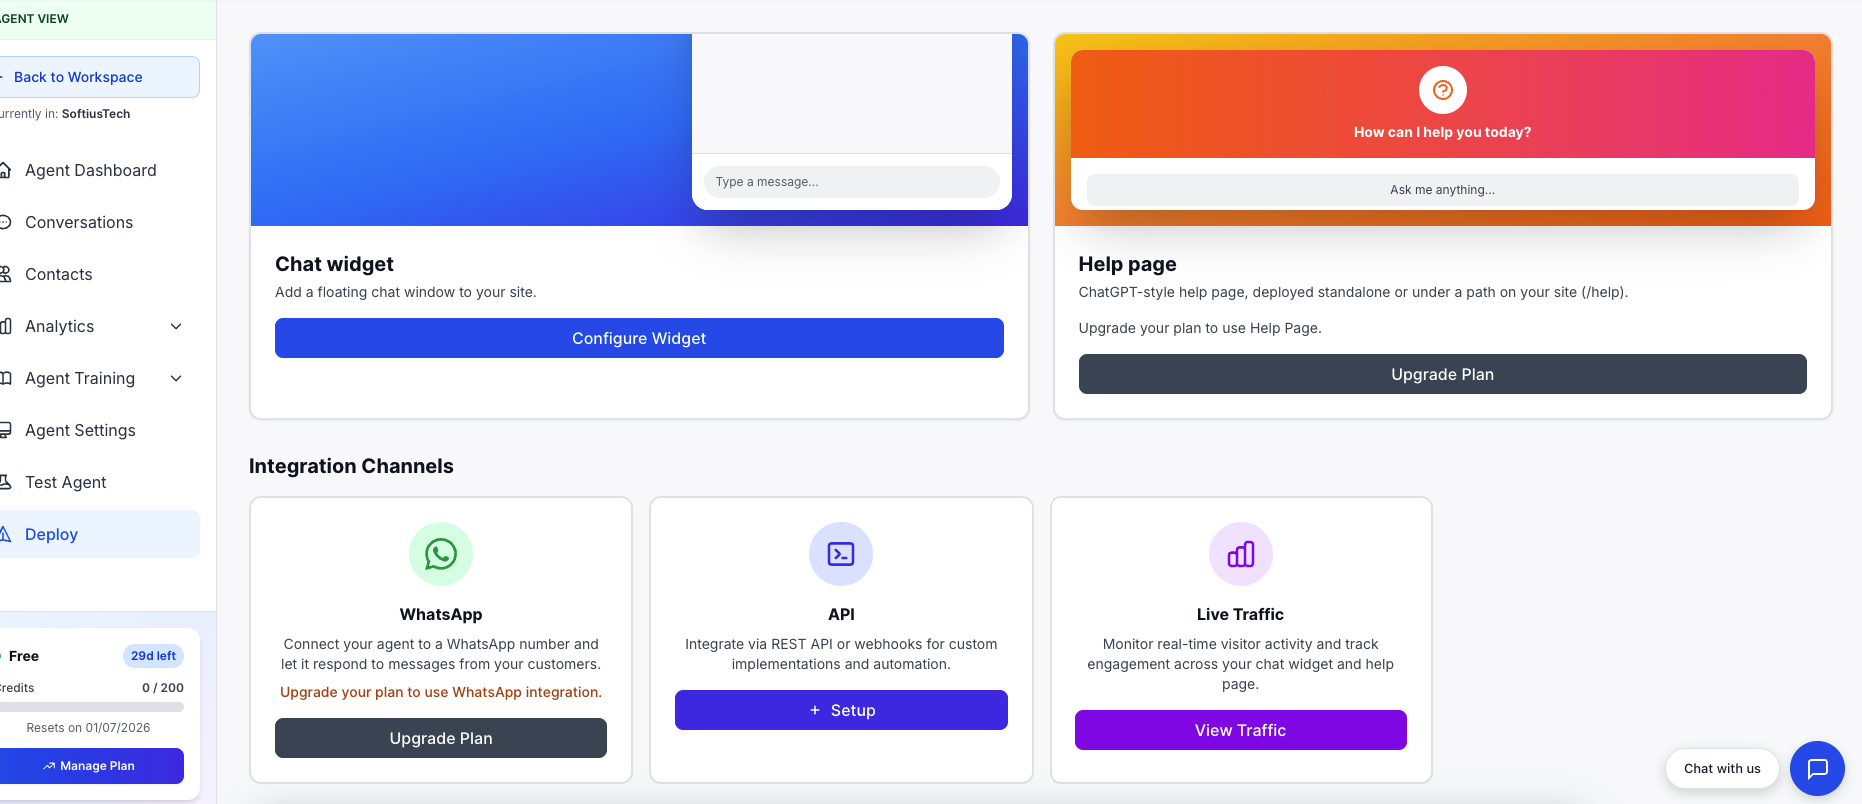 In this guide, we'll use the **Chat widget** option as it's most common. Click on Manage on chat widget then select Embed.
 ### Get Your Embed Code
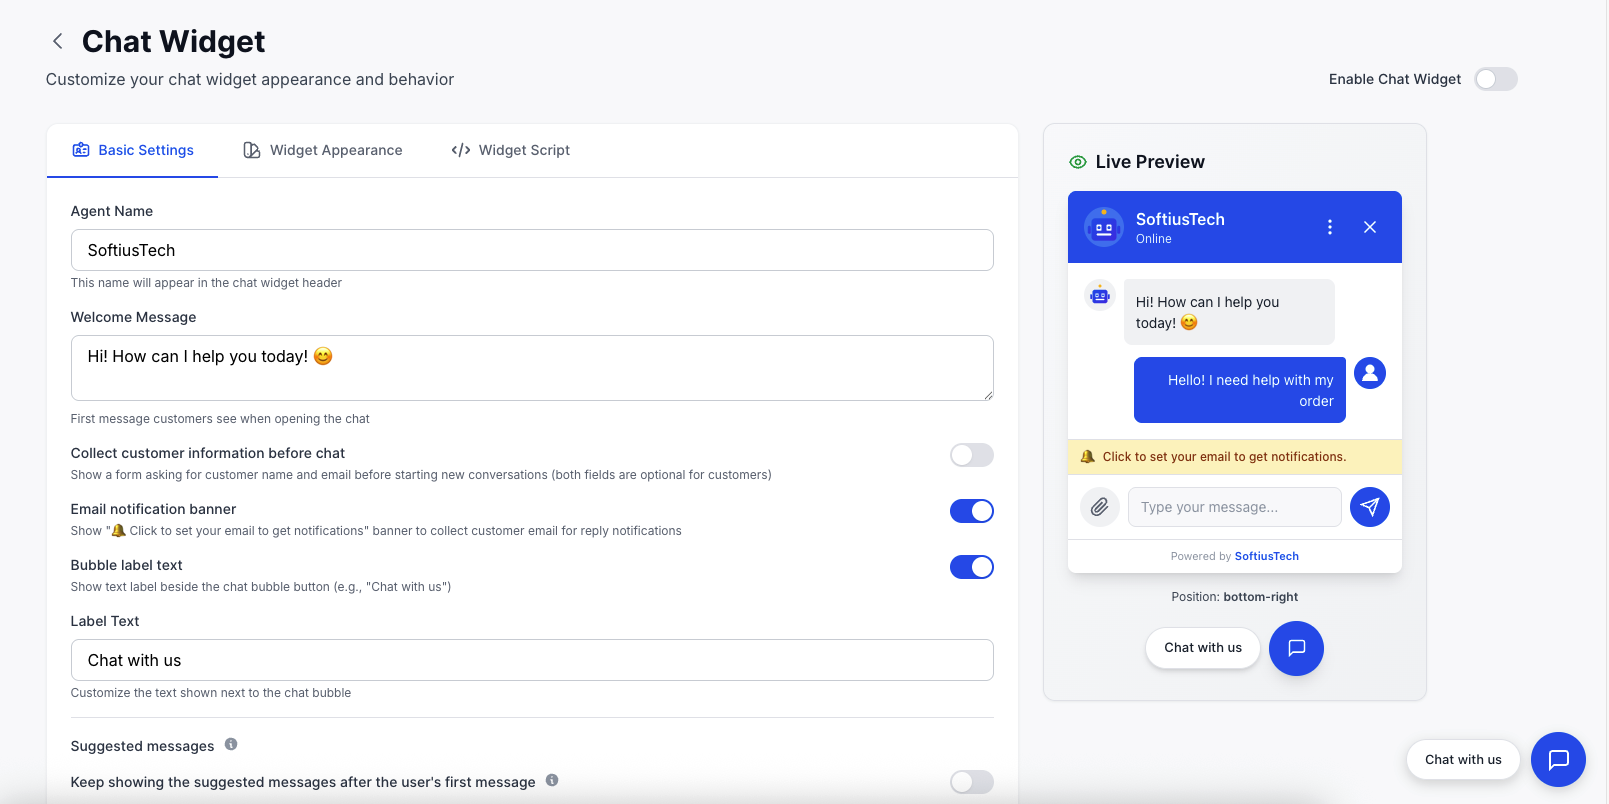
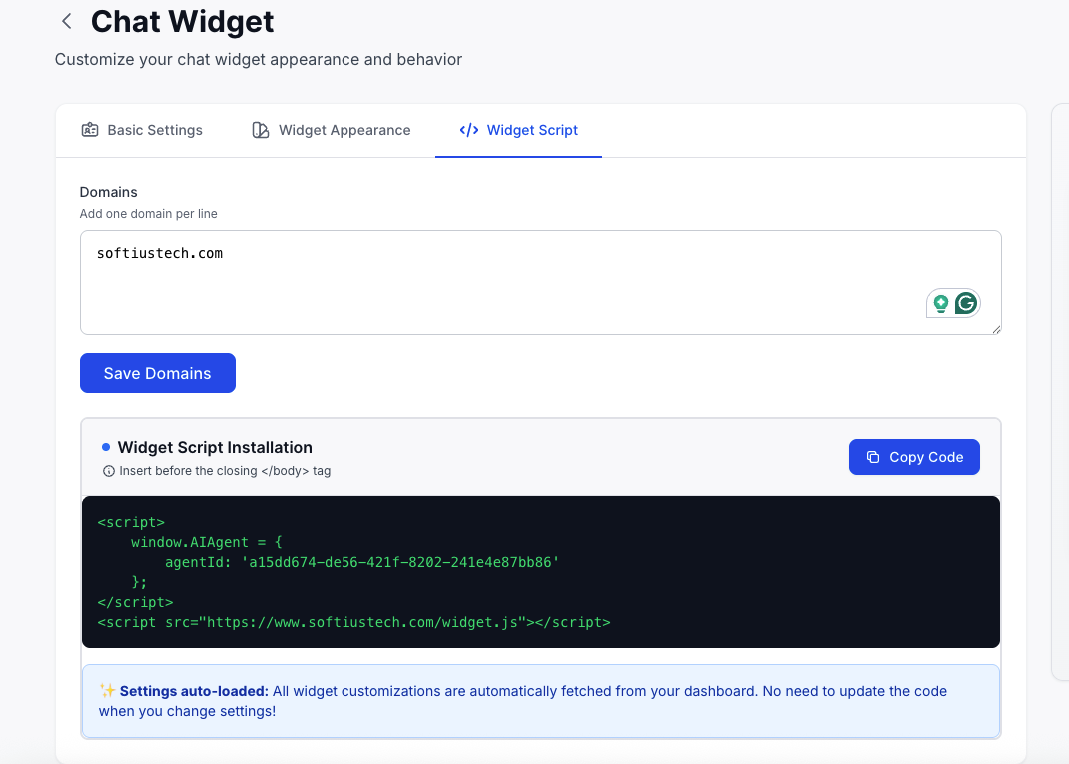
In this guide we'll use the **Chat widget** option. Copy the provided JavaScript code snippet.
### Get Your Embed Code
In this guide we'll use the **Chat widget** option. Copy the provided JavaScript code snippet.
 ### Add Code to Your Website
**1. Locate Your Site's HTML**
Find where you can add JavaScript code to your website. This is usually in the `` section or before the closing `` tag.
**For fast loading:** Place the script just before the closing `
### Add Code to Your Website
**1. Locate Your Site's HTML**
Find where you can add JavaScript code to your website. This is usually in the `` section or before the closing `` tag.
**For fast loading:** Place the script just before the closing `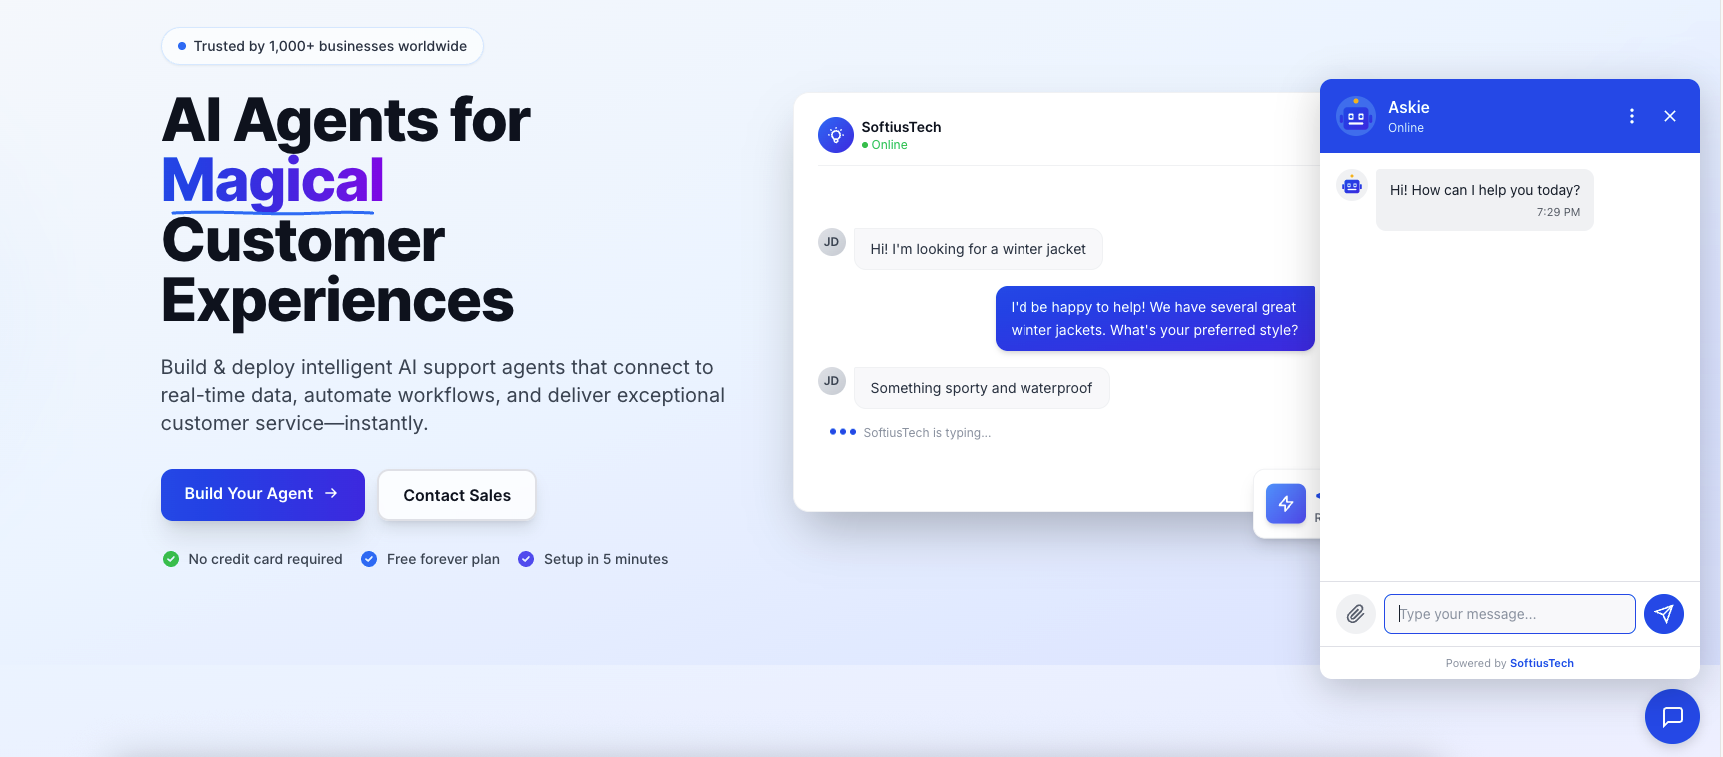 **Success!** Your AI Agent is now live and ready to help your website visitors.
Need more control over your widget? Check out our Developer Guides for more information on JavaScript embed, widget control options, and advanced features.
### Customize Appearance (Optional)
Want to match your brand? Check out our settings guide for style and content customization.
**Success!** Your AI Agent is now live and ready to help your website visitors.
Need more control over your widget? Check out our Developer Guides for more information on JavaScript embed, widget control options, and advanced features.
### Customize Appearance (Optional)
Want to match your brand? Check out our settings guide for style and content customization.
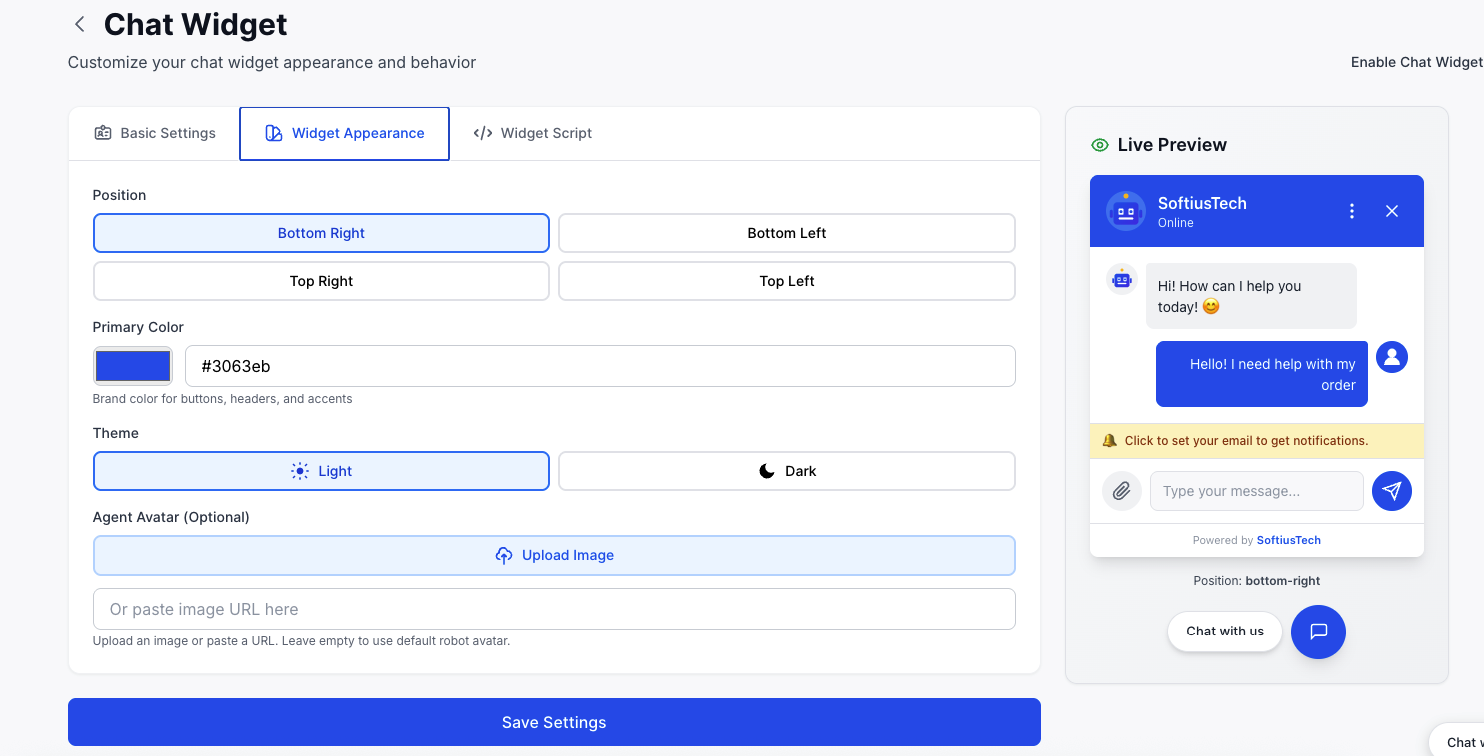 #### Branding Options
* Upload custom chat bubble icon
* Change bubble colors to match your brand
* Customize welcome messages
* Set initial questions users can click
#### Behavior Settings
* Auto-open chat after delay
* Collect user feedback
* Regenerate messages
## 🎉 Congratulations!
You've successfully created, trained, tested, and deployed your first AI Agent! Here's what you've accomplished:
✅ Created an intelligent AI Agent trained on your data
✅ Tested and validated response quality
✅ Deployed it live on your website
✅ Made it accessible to your visitors 24/7
### What's Next?
#### Branding Options
* Upload custom chat bubble icon
* Change bubble colors to match your brand
* Customize welcome messages
* Set initial questions users can click
#### Behavior Settings
* Auto-open chat after delay
* Collect user feedback
* Regenerate messages
## 🎉 Congratulations!
You've successfully created, trained, tested, and deployed your first AI Agent! Here's what you've accomplished:
✅ Created an intelligent AI Agent trained on your data
✅ Tested and validated response quality
✅ Deployed it live on your website
✅ Made it accessible to your visitors 24/7
### What's Next?
` tag to ensure your page content loads first, then the chat widget appears.
**For immediate availability:** Place the script in the `