> ## Documentation Index
> Fetch the complete documentation index at: https://docs.chatros.com/llms.txt
> Use this file to discover all available pages before exploring further.
# Chat Widget
> Add your AI agent as a chat bubble on your website with a single copy‑paste snippet.
The **Chat Widget** puts a chat bubble in the corner of your website. Visitors click it to talk to your agent — and every conversation lands in your Inbox. No coding required; you paste one small snippet into your site.
## Step 1 — Open the widget settings
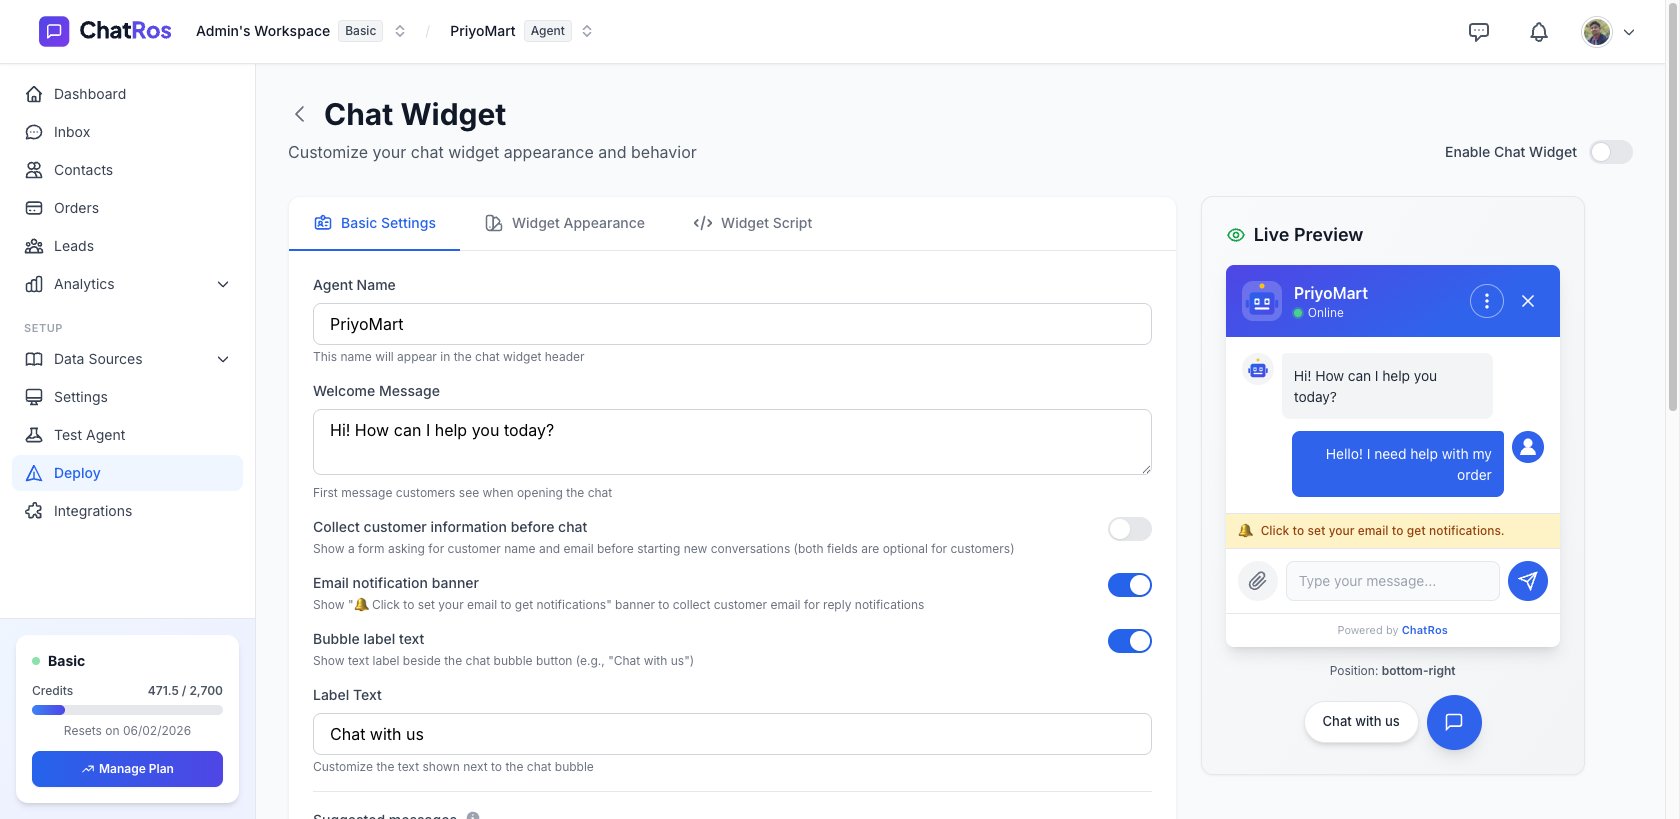
From your agent, go to **Deploy → Chat widget → Configure Widget**. The configuration screen has three tabs — **Basic Settings**, **Widget Appearance**, and **Widget Script** — with a **Live Preview** on the right that updates as you edit.
 ## Step 2 — Set the basics
On the **Basic Settings** tab, set how the widget introduces itself:
The name shown in the widget header (e.g. *Askie*, *Shop Assistant*).
The first message visitors see, e.g. *"Hi! How can I help you today?"*
Optional quick‑reply prompts that give visitors a starting point.
## Step 3 — Customize the appearance
On the **Widget Appearance** tab, match the widget to your brand:
* **Position** — Bottom Right, Bottom Left, Top Right, or Top Left.
* **Primary color** — brand color for buttons, headers, and accents (e.g. `#3063eb`).
* **Theme** — Light or Dark.
* **Agent avatar** — upload an image or paste an image URL (leave empty for the default).
## Step 2 — Set the basics
On the **Basic Settings** tab, set how the widget introduces itself:
The name shown in the widget header (e.g. *Askie*, *Shop Assistant*).
The first message visitors see, e.g. *"Hi! How can I help you today?"*
Optional quick‑reply prompts that give visitors a starting point.
## Step 3 — Customize the appearance
On the **Widget Appearance** tab, match the widget to your brand:
* **Position** — Bottom Right, Bottom Left, Top Right, or Top Left.
* **Primary color** — brand color for buttons, headers, and accents (e.g. `#3063eb`).
* **Theme** — Light or Dark.
* **Agent avatar** — upload an image or paste an image URL (leave empty for the default).
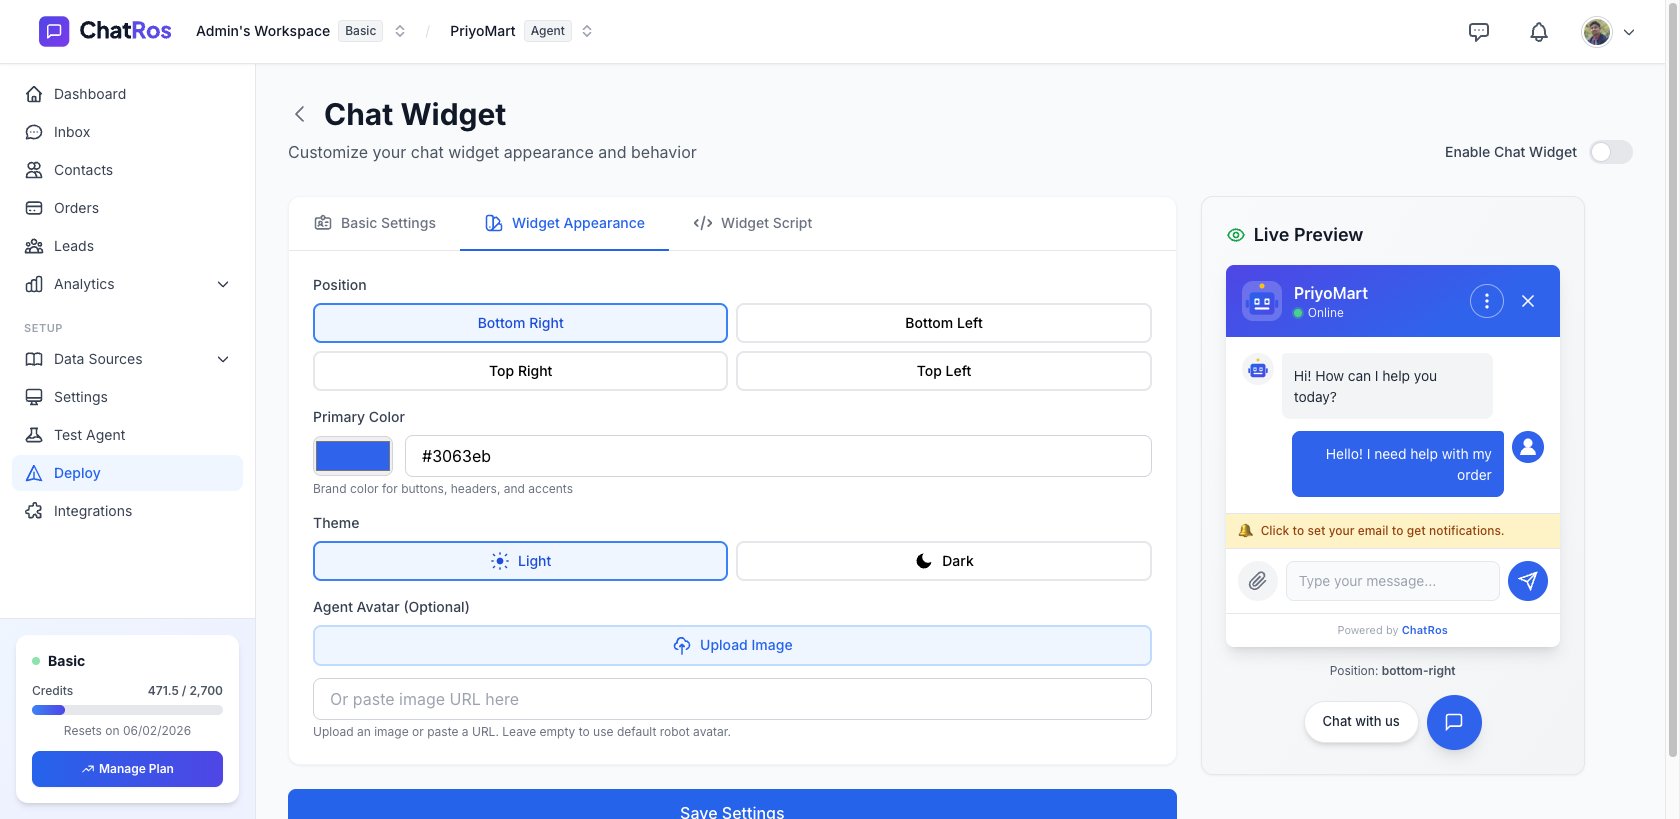 The live preview on the right updates as you edit, so you can see exactly how the widget will look before installing it.
## Step 4 — Install the snippet
Open the **Widget Script** tab and click **Copy Code**. You'll get a snippet like this:
```html theme={null}
```
Always copy the snippet from your own dashboard — it contains your agent's unique ID. The example above is illustrative.
Paste it into your website's HTML, just before the closing `` tag, on every page where you want the widget to appear. Your settings (name, colors, welcome message) are loaded automatically from ChatRos, so you never have to edit the snippet when you change them.
The live preview on the right updates as you edit, so you can see exactly how the widget will look before installing it.
## Step 4 — Install the snippet
Open the **Widget Script** tab and click **Copy Code**. You'll get a snippet like this:
```html theme={null}
```
Always copy the snippet from your own dashboard — it contains your agent's unique ID. The example above is illustrative.
Paste it into your website's HTML, just before the closing `` tag, on every page where you want the widget to appear. Your settings (name, colors, welcome message) are loaded automatically from ChatRos, so you never have to edit the snippet when you change them.